This article guides you through assembling your Yealink T33G, T54W, W70B, and W56H DECT phones, and explains how to properly connect the cables.
Yealink T33G
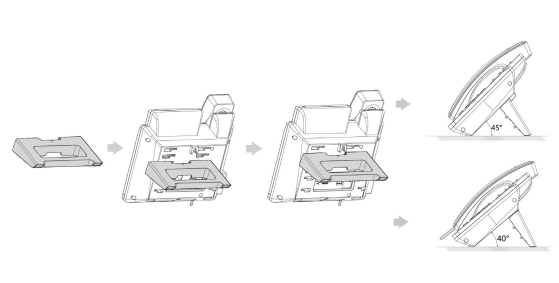
Assembling Your Phone
Slot the stand into the correct interface to support the desired viewing angle, as shown below
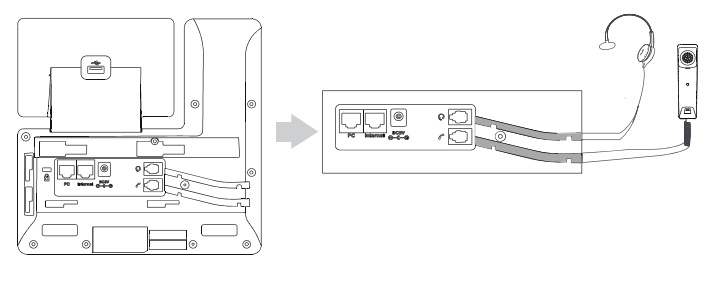
Connect Handset and Optional Headset
Note: Your phone supports headsets using an RJ9 cable. For connection directions, refer to your headset documentation.

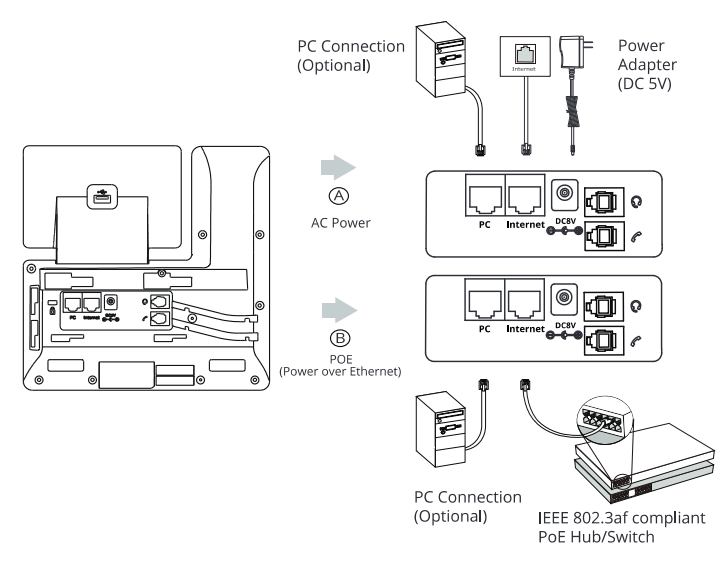
Connect Cables
Please follow the diagram below to install your phone.

Once plugged into power & establishing a network connection, the phone will automatically download its configuration files & become usable. The voicemail box will be functional with a default greeting.
Yealink T54W
Assembling Your Phone
Attach the stand, and adjust the angle of the screen, as shown below.

Connect Handset and Optional Headset
Note: Your phone supports headsets using an RJ9 cable. For connection directions, refer to your headset documentation.
Connect Cables
Please follow the diagram below to install your phone. Once plugged in. the phone will automatically download its configuration and start to work. The voicemail box will be functional with a default greeting.
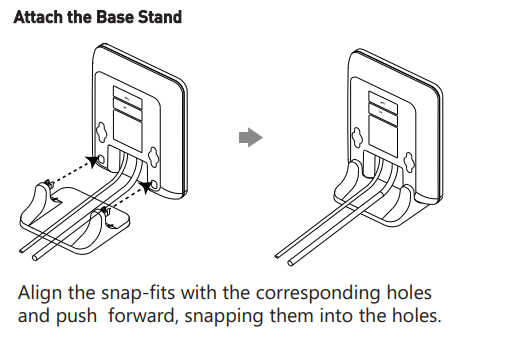
Yealink W70B and W56H DECT Phone
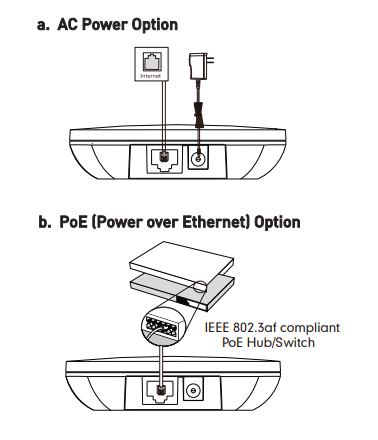
Connect Cables
Follow the diagram to install your phones. Once plugged in, the phone will automatically download its configuration and start to work after a few minutes.
Connecting the Cordless Base:
Open the box and remove the Cordless Base, Power Adapter, and Ethernet cable.
Connect one end of the Ethernet cable to the Internet port on the rear of the Base Station.
Connect the other end of the Ethernet cable to any free port on your existing router or anywhere on your existing data network.
Connect the Base Station Power Adapter to the connector on the Base Station, and then plug the Power Adapter into a power outlet.
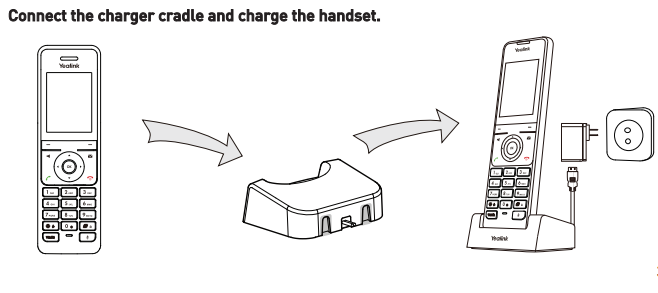
Setting up the Cordless Handsets:
Open the box and remove the Handset, Power Adapter, Batteries, Belt Clip and Charging Cradle.
On the Handset, open the battery cover and insert the battery correctly, then close the battery cover.
Connect the Charging Cradle Power Adapter to a power outlet.
Connect the optional Belt Clip to the Handset if desired.
Place the Handset into the Charging Cradle.

Note: for optimal battery performance, charge the phone for 6 hours before using. Once the phone has been plugged in and operational, the voicemail box is functional with a default greeting.
Was this article helpful?
That’s Great!
Thank you for your feedback
Sorry! We couldn't be helpful
Thank you for your feedback
Feedback sent
We appreciate your effort and will try to fix the article