Enabling the integration with Nexudus and isofy is easy.
Prerequisites in Nexudus
- First and very importantly: you must ensure that all of your members' email addresses in the Nexudus system match with the email addresses and names in isofy.
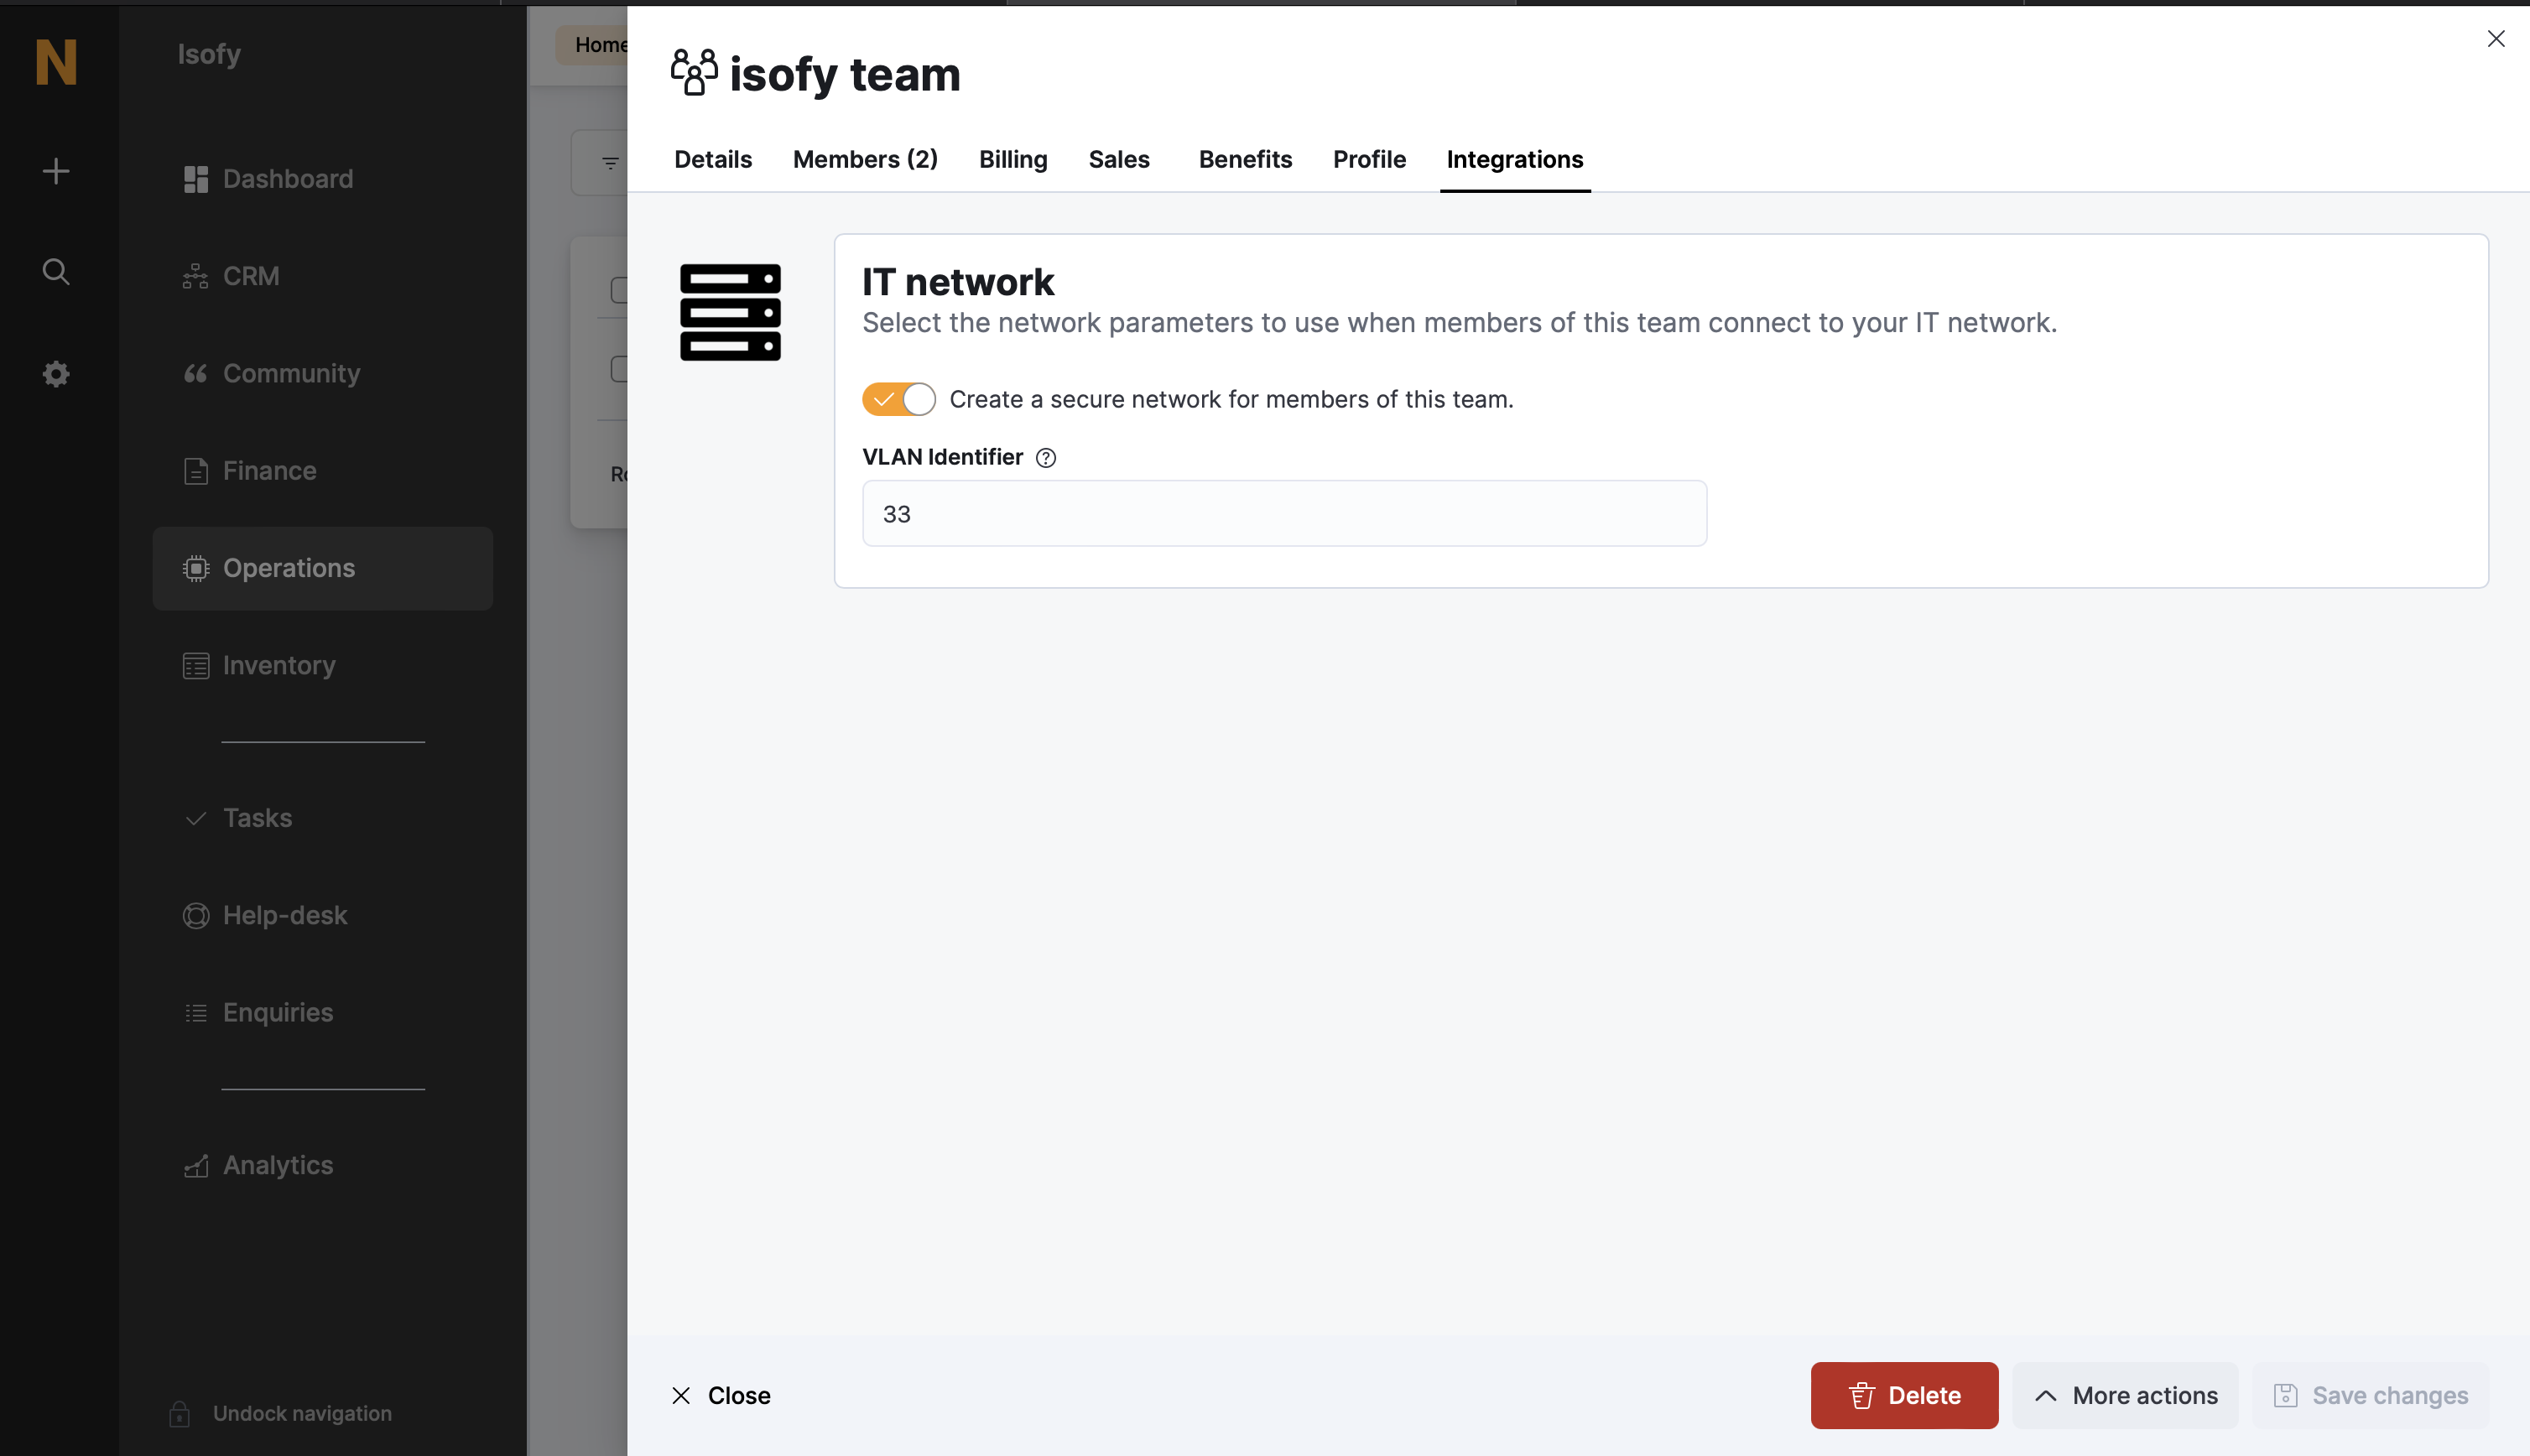
- Second, ensure that each member is assigned to the correct Team in Nexudus. Then, assign a "VLAN Identifier" to the Team. In Nexudus, VLAN Identifier can be found under Operations -> Teams -> select a Team -> Integrations tab. The VLAN Identifier should be the number of the desired Private Network in isofy (typically between 2 and 188). For example, VLAN Identifier 33 will assign all of the Members on that Team to Private Network 33 in isofy. If that private network does not exist yet, isofy will create it.

If a Team has no VLAN Identifier in Nexudus, then all of the Members on that Team will be placed into the general Members network in isofy.
Not completing the above two steps will cause duplicate records and may cause members to end up in the wrong private networks in isofy.
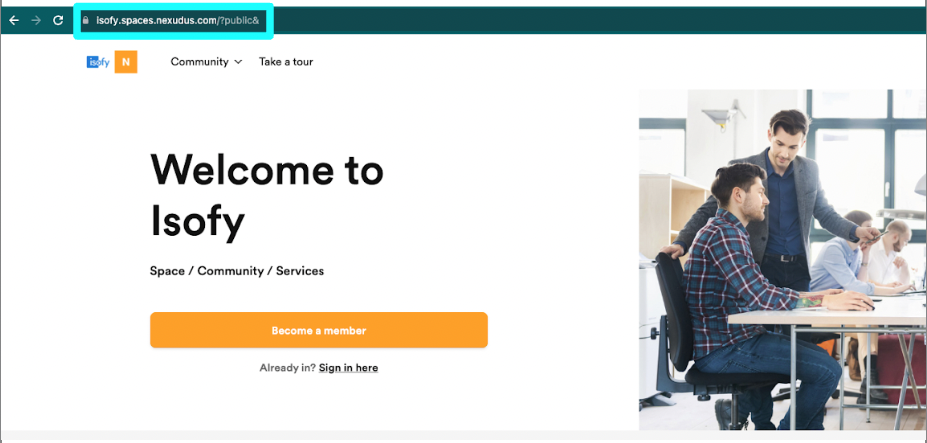
- Third, you will need your Nexudus subdomain. Your subdomain is the part of you Nexudus URL preceding spaces.nexudus.com - for example, if your domain was isofy.spaces.nexudus.com, then in the subdomain field you would enter "isofy".

- Fourth, you will need an API key, which can be attained by reaching out to your project manager or the isofy support team at support@isofy.tech.
- Fifth, you will need to enable Nexudus Connect, which you can do using the following articles from Nexudus:
Steps to Enable the Integration in isofy
- In the isofy Admin Dashboard sidebar, choose "Settings", then "Integrations":

- Choose "Nexudus":

- Fill in the "Nexudus Subdomain" field:

- Finish by choosing "Activate Integration":

- Make sure to also configure the integration options, as described in the next section!
Configurable Options in isofy
The following options can be enabled or disabled by moving the toggle switch on the integration settings page:
Check-in Module

If a Team has no VLAN Identifier in Nexudus, then all of the Members on that Team will be placed into the general Members network in isofy.
Not completing the above two steps will cause duplicate records and may cause members to end up in the wrong private networks in isofy.


This option will enable Nexudus login on the captive portal login page, allowing your users to log in with their Nexudus accounts.
Password Authentication:
This option enables password authentication for members to authenticate with their credentials from Nexudus.
Member Access Token:
This option enables member authentication via access tokens from Nexudus.
Guest Token Authentication:
This option enables guest authentication via guest tokens from Nexudus.
Check-out Parameters
To help avoid accidental check-outs (for example, a member walking to his or her car), a variable "grace period" can be configured. The grace period represents how long a member can be disconnected from the network before isofy considers them to be "checked-out." In the isofy Admin Dashboard's sidebar, choose Settings, then Business. Near the bottom of the page, under "Check-out grace period (in minutes)," you can adjust this variable.

After adjusting the Check-out grace period, click the blue "Edit" button to save your selection.

Nexudus configuration
While the integration is now active, there are a few things to check in the Nexudus portal in order to ensure that your members are able to connect to the right network:
- All members must have a plan associated with their account, and that plan should allow for internet access. For help creating or assigning plans, please reach out to Nexudus support.
- As described above, private networks are created under the 'Team' section of Nexudus
- Select a Team in Nexudus
- Choose the tab "Integrations"
- Select the toggle for 'Create a secure network for members of this team'
- Assign a numeric VLAN identifier between 2-188 (the VLAN identifier must be unique per team)
Was this article helpful?
That’s Great!
Thank you for your feedback
Sorry! We couldn't be helpful
Thank you for your feedback
Feedback sent
We appreciate your effort and will try to fix the article