This guide will walk you through connecting your device to our network. Our system uses a captive portal that automatically prompts you to sign in or register a new account. Once registered, your device is linked to your account and placed on the correct network.
TABLE OF CONTENTS
- For Administrators: Before You Begin
- Step-by-Step Guide for Connecting Your Device
- Troubleshooting & FAQs
For Administrators: Before You Begin
For users to be able to register themselves on the network, the Self-Registration feature must be enabled in the admin dashboard.
In the dashboard, navigate to the Settings menu on the left panel and select Business.

Click on the Sign In tab.
Ensure the toggle for Registration is enabled.

Step-by-Step Guide for Connecting Your Device
Step 1: Connect to the Wi-Fi
Open your device's Wi-Fi settings and connect to the business network (e.g., "YourBusiness WiFi"). Enter the password if prompted.

Step 2: Open the Captive Portal
Once connected, a login screen known as a captive portal should automatically open in a pop-up window or your web browser.
If the page doesn't open automatically: Open a web browser (like Safari or Chrome) and try to visit any website. The portal page should appear.
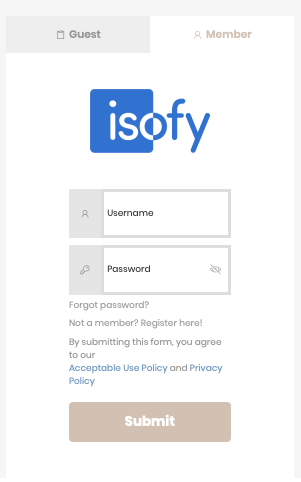
Step 3: Sign In as Guest or Member, or Register an account to become a Member
The portal will give you two (2) options.
A) If you are a visiting user and only need to connect for a few hours or to test the connection in the space:
Select the Guest tab.
- Enter your information (Name, Email address and your phone number). You will receive an SMS code at your phone number for verification.

B) If you are an Existing User/Member:
- Select the Member tab.
- Enter the credentials (e.g., email address and password) you used when you first registered.
- Your device will be recognized and connected to your assigned network.
C) If you want to become a Member:
- Select the Member tab and click the link that says "Not a Member Yet? Register here!"
- Enter your information (Name, Email Address, Phone Number, and your Password). Be sure to provide a mobile number that can receive SMS text messages for verification.

3. You will receive a verification code via SMS. Enter this code on the screen to validate your number.
4. Next, you may be asked for a Registration Code.
What is a Registration Code? This code ensures that new users are instantly assigned to their respective private network.
If you have a code, enter it to be placed on your assigned private network immediately. The code can be provided by the staff.
If you do not have a code, simply click "Connect" to connect to the network, and you'll be placed on the Member network.

Step 4: Connection and Confirmation
After you submit your information, your device will briefly disconnect and then automatically reconnect to your assigned network (e.g., "Member Network" or "Guest Network").
A success screen will appear, confirming that you are connected. You're all set!
Troubleshooting & FAQs
Q: I connected to the Wi-Fi, but the login page (captive portal) never appeared. A: Open a web browser and try to navigate to a simple, non-encrypted website like http://neverssl.com. This usually forces the portal to appear.
Q: I didn't receive the SMS verification code. A: Double-check that you entered the correct mobile number. If it is correct, wait a minute and then use the "Resend Code" option if it's available.
Q: How do I know if I'm successfully connected? A: You will see the success page. You can also go back to your device's Settings > Wi-Fi. A checkmark should appear next to the network name, indicating a successful connection.
Q: I connected to the guest network by mistake. How do I get on my private network? A: Please speak with a staff member. They can move your account and device to the correct network from the admin dashboard.
Was this article helpful?
That’s Great!
Thank you for your feedback
Sorry! We couldn't be helpful
Thank you for your feedback
Feedback sent
We appreciate your effort and will try to fix the article