If you find members constantly rejoining the network or logging into the welcome page every day, it's likely due to their device's privacy settings.
Modern operating systems use features that regularly change your device's network address (MAC address) to enhance privacy. However, our network uses this address to remember your device. When the address changes, our system sees it as a new device and asks you to log in again.
To ensure a stable connection, you'll need to adjust three key settings:
Private Wi-Fi / Randomized MAC Address
Limit IP Address Tracking
iCloud Private Relay (for Apple devices)
Follow the steps below for your specific device to stay connected without interruptions.
TABLE OF CONTENTS
- For Apple devices on OSX Sequoia 15.0 or later:
- Disable iCloud Private Relay (All Apple Devices)
- For Windows 11 Devices:
- For Windows 10 Devices:
- For Android Devices (on Android 12 or higher):
- For iOS Devices (iPhone/iPad):
- In macOS Ventura or later:
- In macOS Monterey:
For Apple devices on OSX Sequoia 15.0 or later:
1. Open System Settings by hitting the Gear icon
2. On the sidebar, click Wi-Fi.

3. Find your connected network at the top of the list and click the three dots next to the Wi-Fi status bar.

4. Once you click the three dots, options will appear to Copy Password, Network Settings..., and Forget This Network. Click Network Settings.

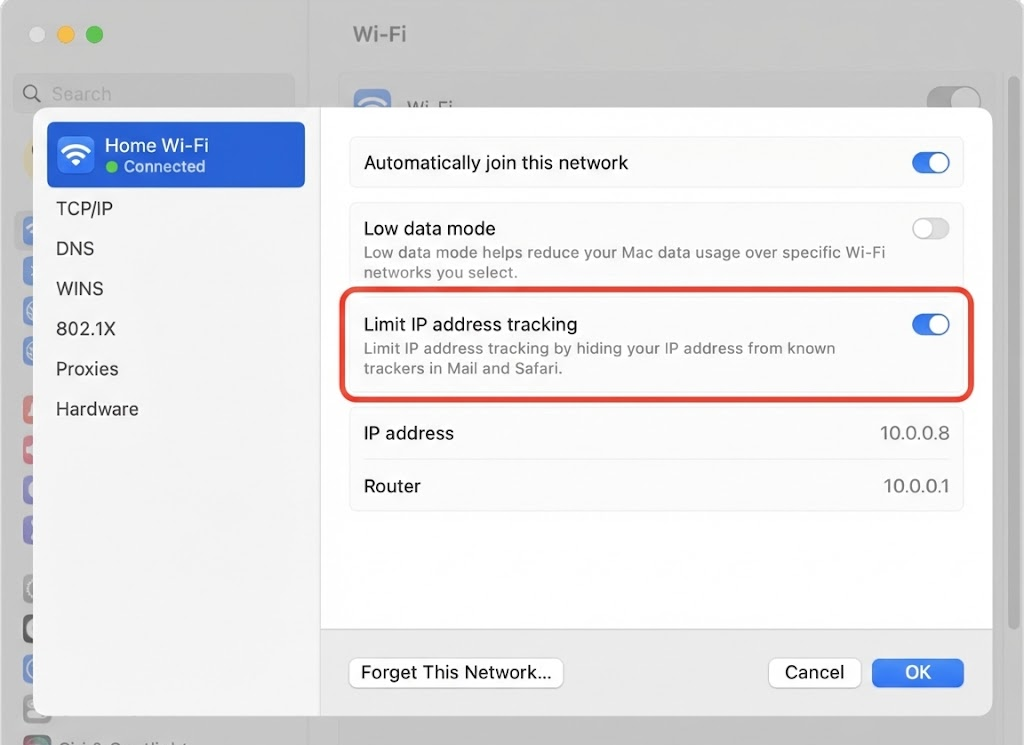
5. Next, you will see this page below showing Private Wi-Fi Address and Limit IP Address Tracking. See the image below as to what the settings should look like.
- Under Private Wi-Fi Address, click "Rotating" and change to "Fixed" or "Off".
- Under Limit IP Address Tracking, toggle the setting to Off.

Disable iCloud Private Relay (All Apple Devices)
This feature can override your network settings and cause connection issues.
Open Settings (on iPhone/iPad) or System Settings (on Mac).
Tap or click your Name / Apple ID at the top.
Select iCloud > Private Relay.
Turn the feature OFF.
For Windows 11 Devices:
- Hit the Windows key or the Start Button.
- Click "Network & Internet".

3. Click Wi-Fi
4. Toggle "Random Hardware Addresses" to Off

For Windows 10 Devices:
- Select the "Start" button in the bottom left corner of the screen
- Select the gear icon to go to "Settings"
- Select "Network and Internet"
- Select "Wi-Fi"
- Set "Use random hardware addresses" to "Off"
For Android Devices (on Android 12 or higher):
- Open Android Settings on the device.
- Navigate to Network & Internet
- Tap on "Wi-Fi".
- Select the Wi-Fi Network
- Find the specific Wi-Fi network for which you want to disable MAC randomization.
- Tap on the network name (or hold it and tap "Modify").
- Advanced Options
- Scroll down to find "Privacy" or "MAC Address" settings. It may be labeled as "Use randomized MAC" or similar.
- Choose "Use Device MAC"
- Tap the privacy or MAC address setting and change it from "Randomized MAC" to "Use Device MAC."
- Save Changes and reconnect to the network.
For iOS Devices (iPhone/iPad):
- Navigate to the Settings Icon
- Click Wi-Fi
- Click on the "i" icon next to the network you are connected to

4. Next, you will see this page below showing Private Wi-Fi Address and Limit IP Address Tracking. See the image below as to what the settings should look like.
- Under Private Wi-Fi Address, click "Rotating" and change to "Fixed" or "Off".
- Under Limit IP Address Tracking, toggle the setting to Off.

In macOS Ventura or later:
Choose Apple menu > System Settings.
Click Network in the sidebar, then click the network service that you're using (such as Wi-Fi) on the right.
Click the Details button next to the name of the network that you're connected to.
Turn off "Limit IP address tracking."
In macOS Monterey:
Choose Apple menu > System Preferences.
Click Network and select the network from the list to see more options.
Click the check mark next to Limit IP Address Tracking.
Was this article helpful?
That’s Great!
Thank you for your feedback
Sorry! We couldn't be helpful
Thank you for your feedback
Feedback sent
We appreciate your effort and will try to fix the article